
Posted on 6.16.21
HAL'S NOTES: Weck Jars

In fact, they are the equivalent in popularity to our standard mason jar and they have been used for decades there.”
- 1 liter = 33.8 ounces or just over a quart
- A half-liter = 16.9 ounces or just over a pint
- A quarter-liter = 8.5 ounces just over a cup, which is a regular jelly jar
comments in italics.
- All Glass Container: They come in really unusual shapes and sizes. And when I say unusual, I mean beautiful! Tulip shape probably not practical for canning but great for non-shelf stable gifts or display.
- Glass Lid: Instead of the metal lid we are used to, these jars have glass lids. Reusable, similar idea to Tattler Brand reusable canning lids, but not plastic like Tattler.
- Gasket: The rubber gasket has essentially the same purpose as the rubber gasket that is embedded into the metal lid of a typical mason jar .
- Clips: “Stainless steel clips snap down onto the lid and hold the lid in place during processing” These serve the same function as the traditional metal screw-on band.
Please note, Weck Jars are not the same as “Bale Jars” which have the two part wire latching system attached to the top and are not recommended for canning.
So how do Wecks compare in cost to Mason type jars?:
- 2 Units of 6 @ 8 ounce Weck Jars costs $59.98 on Amazon.
- 12 @ 8 ounce Mason/Ball jars $17.50
Here
is the technique for using these jars as outlined in Living Homegrown
article. My additional comments are in italics.
1. The first few steps are the same for Weck and traditional jars including washing and sterilizing the jars if you are processing in a water bath for less than 10 minutes. The rubber gaskets should be soaked in hot water to soften them. Then the technique changes some.
2. After your jars are filled with your preserves, you wipe the rims and place a rubber gasket onto the glass lid. Then you set the lid (with gasket) on top of your jar.
3. At this point, you add the metal clips to hold that lid in place during processing. It takes a little time to get used to using those metal clips because they snap down really hard and you feel like you’re going to break the jar. But after a few uses, you will get the hang of it.
4. The process time is based on the jar size – since the jars are in metric, there may be some math involved as you have to determine the length of process time.
5. After processing, you let the jars sit and cool just like you would any other jar. As they cool, they create the vacuum seal.
6. Once they’re cool, it’s important to remove the clips. The clips are only there to hold the lid in place during processing.
7. Since the glass tops won’t “ping” when they seal sucks down creating a “dimple,” sources suggest that the way to tell if it successfully sealed is if the tab of the rubber gasket “points down” When the jars have fully cooled (12-24 hours) remove the clips and see if you can gently pick up the jar by the lid.
8. Weck jars are used for both water bath canning and pressure canning. But several of the sources suggest that they don’t personally pressure can in them.

Which brings us to the elephant in the room, are they safe to use for shelf-stable canning?
Currently Weck Jars are not USDA approved.
~ Reduces waste: The jar and lid are glass, the ring
consists of compostable rubber, and the clamps are metal.
~ No rust on rings or risk of turning the rings too tight.
~ Great variety of shapes and sizes: Have up to 23 sizes and
may shape
~ Available in places where Ball jars aren’t. To some of us, this is a deciding factor.
CONS
~ Not USDA approved. This could be a deciding factor for
you.
~ The jars are expensive.
~ You can generally fit fewer in a canner than with Ball
jars.
~ May be hard to gauge safe canning time.
~ You need different tools than for Ball jars.
~ You don’t get that awesome
https://www.simplycanning.com/weck-jars/
As always they do a very indepth article. This includes the jars, the Weck company, frequently asked questions, some of the Weck company’s other products and an ongoing study of Weck jars by
Please Note, at the time of their writing, NCHFP deemed “The WECK Home-Canning Book”
to be unsafe.
https://www.healthycanning.com/weck-jars/
##
Posted on 6.12.21
HAL'S NOTES: Freezing in Jars
For this post I am summarizing the tips and cautions found in three great online articles.
Garden Betty’s - "How to Safely Freeze Liquids in Mason Jars"; Fillmore Containers’ - "Freezing in Canning Jars 101"; and Don’t Waste the Crumbs - "How to Prevent Glass Breaking in the Freezer." You'll find the links to all three of these articles at the end of the post.
As Garden Betty, (Linda Ly) starts her post, “Can you freeze liquids in mason jars? The short answer is yes, but there's a trick to doing it safely to prevent broken glass in your freezer.”
Like her, I employ the flat pack Ziploc baggies method most of the time, but jars do have several advantages particularly with freezing liquids:
You reduce the struggle of filling without spilling.
Baggies are prone to leak as they freeze if overfilled or get pin-hole punctures.
Jars can go directly from the freezer to defrosting in the refrigerator without transferring into another container.
There is almost no end to the times you can reuse jars if you are careful.
Freezing is one the few times you can reuse regular canning lids safely. Storage of dry goods like rice or grain is another.
Plus they help us to reduce excessive use of plastic.
The articles give several guidelines for choosing the right jars, filling, freezing and defrosting.

Right shape: freeze in jars with straight sides with no “shoulder. The opening at top shouldn’t be any narrower than the jar itself.


Lids: You can reuse canning lids that are no longer safe for canning. Also there are reusable plastic lids for non-canning storage.
Use caution when filling jars with hot contents for freezing just as you would for canning. The Fillmore article suggests, “ ..be sure to start with clean, room-temperature jars (around 70-degrees). Fill jars with a product that has cooled to 160-degrees, then let cool to room temperature before placing jars in your freezer.” Others suggest adding additional cooling in the refrigerator at this point for up to overnight before freezing.
Defrosting: Fillmore suggests, “To safely defrost jars, set them on a dish towel or paper towel on a plate or tray (to hold/absorb the melting condensation) and allow thawing in the refrigerator overnight, or on your counter if you are able to monitor them. If you need to speed up the process you may set them in a few inches of lukewarm water. Do NOT try to microwave a frozen jar.”
There is so much additional information available in the articles including loads of tips on keeping the jars safe in the freezer. I’d encourage everyone to take a look at all 3 articles.
Garden Betty’s "How to Safely Freeze Liquids in Mason Jars"
https://www.gardenbetty.com/how-to-safely-freeze-liquids-in-mason-jars/
Fillmore Containers’ "Freezing in Canning Jars 101"
https://www.fillmorecontainer.com/blog/2013/06/13/freezing-in-canning-jars-101/
Don’t Waste the Crumbs
https://dontwastethecrumbs.com/prevent-glass-breaking-freezer/
##
Posted on 6.2.21

Nothing can be more unsettling than pulling your jars from the canner and finding there is noticeably a lot less liquid in the jar then when you put them in. The carrots that were beautifully submerged are sticking out a good half inch. What happened? Are they ruined? If we keep them, are we playing Russian Roulette with our health, or the health of our loved ones?
A great post from Healthy Canning.com eases our fears in the first three short paragraphs,
“Jars will often lose or appear to lose some liquid during processing, especially during pressure canning. It seems to rarely happen during water-bathing.
"This is not a safety concern, but it will shorten the shelf-life of those canned goods.
"If liquid has been lost from jars, but the jars have sealed, do not reopen them to replace it. Use those jars first or food may become discolored. If more than half of the liquid in the jars has been lost, the food may not be adequately processed. In this situation, break the seal on the lid, refrigerate the jar and use it within 2 to 3 days.”
Their article is so good I encourage you to take a look at:
To entice you, here is their brief list of reasons you may have lost liquid in your jars.
Siphoning — liquid in the jar being forced out or drawn out;
Improper cool-down procedure;
Hidden air in the jar making itself known and rising to the top of the jar;
Lid related;
Water-bath canning issues.
#1 applies to pressure canning; #2 to #4 can apply to either pressure or water bath canning; #5 applies to water-bath canning.
Posted on 1.9.21

HAL'S NOTES: Types of Vinegar
If you have ever made wine, you may be familiar with the process of fermentation that take the sugar present in grapes (or other fruits) and turns it into ethyl alcohol - the kind of alcohol we drink. But in the right (or wrong) conditions there is a second fermentation process that takes that fine alcohol and turns it into acetic acid, making vinegar out of wine. So we can be pretty sure that vinegar making is as old as brewing - at least since 3000 BC by the Babylonians.
“When it comes to pantry staples, vinegar is part of the big four, along with salt, pepper and oil. And vinegar is unbelievably versatile, whether whisked into salad dressings, used to pickle vegetables or marinate meats, stirred into braises, or drizzled on top of a dish as a finishing touch.
"But with so many vinegars on the market, how do you tell your white wine vinegar from your white distilled? And which works best for what purpose?”
~ from Allrecipes.com The Differences Between the Six Most Popular Types of Vinegar
This article breaks down in detail the six more popular vinegars:
1. Distilled White Vinegar
2. White Wine Vinegar
3. Red Wine Vinegar
4. Apple Cider Vinegar
5. Balsamic Vinegar
6. Rice Vinegar
For more, watch the informative video and read the complete article at Allrecipes.com
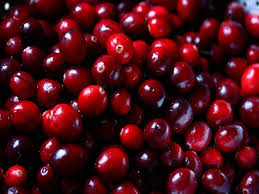
Cranberry Facts
GENERAL
Wilipediia
Cranberries are low, creeping shrubs or vines up to 7 feet long and 8 inches with slender, wiry stems and small evergreen leaves.. The cranberry fruit is larger than the leaves of the plant. It is a perennial plant. Some cranberry vines in Massachusetts are more than 150 years old.
Cranberries were originally called ibimi. The Pequot Indians of Cape Cod called the berry ibimi, meaning bitter berry. As anyone who has bitten into one knows, it has an acidic taste that usually overwhelms its sweetness. According to Ocean Spray , Native Americans would combine cranberries, fat and ground venison to make a survival cake known as pemmican. .https://www.thatsitfruit.com/blogs/default-blog/10-interesting-facts-about-cranberries#:~:text=Cranberries%20are%20one%20of%20the,do%20not%20grow%20in%20water
Cranberries are one of three cultivated fruits native to North America. The other two are blueberries and concord grapes.
- Native Americans used the cranberries for food and medicine, as well as a dye as early as 1550 and we still use them for all those things
- The 5 states known for growing cranberries are: Massachusetts, Wisconsin, New Jersey, Oregon, and Washington. They are in season October to December..
- Cranberries grow in bogs but not in ponds or lakes. The images we see of farmers in small boats are taken at harvest time when the bogs are flooded with water the night before the harvest.. Growers then churns the water to loosen the cranberries from the vine. Each berry has tiny pockets of air that allow it to float to the surface of the water..
- Cranberries’ many health benefits such as preventing urinary tract infections, reducing the risk of cardiovascular diseases, and helping slow down tumor progression. Cranberries can help whiten your teeth because cranberry juice contains a chemical that blocks pathogens that cause tooth decay if you eat them as a natural berry. Adding sugar defeats the dental hygiene.
- Only about 5% of cranberries are sold fresh while the rest are turned into cranberry juice, sauce, etc.
- Cranberries can be stored in the refrigerator up to one month or the freezer for nine months
- One cup of cranberries is about 50 calories.
- November 22 is National Cranberry Relish Day
- Funny Cranberry Video https://www.facebook.com/watch/?v=367030647959742
Learn why the ways of The Amish are worthy of respect and consideration by those who also value community and self-reliance Click Here

- Jars or jar lids that are not manufactured for canning may fail to seal: Resist the temptation to save money by using odd jars. It’s not a savings in the long run. Also, no matter how “unused” they appear, do not re-use jar lids. Once they’ve been sealed and unsealed, they may not have sufficient sealing compound between the jar rim and the lid to ensure a good seal. Plus, they may not be quite flat, which can prevent a solid contact all the way around the rim.
- Defective Jars: A chipped or uneven jar rim will prevent the rubber sealing compound on the lid from making a solid seal.
- Old Screw Bands: The screw band may be rusty or bent, which prevents the lid from receiving equal pressure all the way around the jar rim. Without even pressure, the sealing medium on the lid can’t get a solid grip on the jar rim, and all it takes is a tiny breach to prevent a seal.
- Loose Bands: Sometimes jars fail to seal because the band was not screwed down properly. Too loose and the lid fails to seat onto the jar rim. Too tight and air may not be able to escape from the jar, thus preventing a vacuum from forming as the jar cools. The manufacturer of Ball and Kerr canning lids recommends tightening bands until the point of resistance, “Finger Tight”.
- Dirty Jar Rims: If there is any food particles trapped between the jar lid and the glass rim, this can interfere with a good seal in much the same way as a chip or uneven spot. Wipe the rim of each jar after you’ve packed it and before you apply the lid and ring. Use a clean, damp paper towel.
- Overflowing Jars During Processing: Liquid may have boiled up and out of the jar during processing and left little bits of food between the jar rim and the lid. Sometimes this just happens, but making sure you leave the suggested amount of headspace (space between contents and jar rim) will reduce the chances of not sealing for this reason
- Not Enough Heat: Sometimes jars fail to seal because the processing heat was not sufficient enough to force the air out of the jars and create a vacuum as the food cools. Make sure your pressure canner reaches and maintains the recommended pressure and processing time to ensure that the food is hot enough to seal (and to prevent spoilage).
- Tampering With Jars As They’re Cooling: Forced release of pressure can “pull” the liquid out of the jars, leaving bits of food on the sealing rim and interrupting the formation of a seal. Don’t mess with the cooling process!
- There Were Air Bubbles: Certain raw-packed foods need extra attention to ensure that air doesn’t get trapped and prevent the jar from sealing. For dense foods, such as squash and pumpkin, Extension Services recommend removing any trapped air bubbles prior to sealing by slipping a chopstick or rubber spatula down into the bubble to give it a path to escape.
- You’re Doing It All Wrong: Not following recommended canning procedures can also prevent jars from sealing….if the canning manual recommends certain procedures, follow them to the letter. For example, ……. the canning manual instructs you to process for 10 minutes, but your grandma never did it this way, assume the 10 minutes is required to ensure that the food is hot enough to cause the jar to seal.
More Canning Help
In prior decades, sometimes jars didn’t seal because the jar lids weren’t properly prepared. However, this was when the rubber seal on the lid was indeed rubber and performed best when softened by immersion in boiling water. However, in 1969 manufacturers switched to using Plastisol, which doesn’t require softening. So the definitive word is that as long as you don’t boil your lids, manufacturers say it’s OK to immerse them in sub-boiling water if you prefer.
So what can you do with jars that haven’t sealed so as not to waste the precious contents?
PickYourOwn.org suggest the following, Reprocessing procedure
If a lid fails to seal on a jar, you have 3 different options:
Remove the lid and check the jar-sealing surface for tiny nicks. If necessary, change the jar, add a new, properly prepared lid, and reprocess within 24 hours using the same processing time as recommended in the recipe.
Adjust headspace in unsealed jars to 1½ inch (to allow for expansion) and put it in the freezer, upright, instead of reprocessing.
Refrigerate unsealed jars and eat canned product within seven days of refrigeration
There is almost nothing as disappointing as opening your water bath or pressure canning and finding a jar has broken in the canning process unless it is finding that some of those beautifully filled and intact jars have failed to seal. In this post we’ll explore the reasons why jars break and ways to avoid these disasters. It is an overview with links to take you to more in depth articles. First let's discuss jars breaking.
I like to think about the process of canning as being a little like Schrodinger's Cat, until you open the canner those jars that you had taken the time to fill with the beautiful produce of the season might be either broken or not broken but until we open it we don’t know which it is. Fortunately, the vast majority of the time the jars are just fine, but if one breaks it can be a bit of a ‘black box’ mystery. Recently I ran across a drawing that illustrates how we can tell which of three likely causes is at work.

Internal pressure break is characterized by the origin of the break on the side. It is in the form of a vertical crack that divides and forks into two fissures. To prevent pressure breaks: Provide adequate headspace in jars for food to expand when heated.
Impact breaks originate at the point of impact and fissures radiate from the point of contact. To prevent impact breaks: Handle jars carefully (From
General Conditions that cause breaking include:
- Using old jars or lower quality commercial food jars rather than jars made specifically for canning. While “Miracle Whip and mayonnaise jars are the perfect size and threads fit, they break so easily in the canner they just aren’t worth it.” (PickYourOwn.org) There are some brands of spaghetti sauce that come in more robust jars, but it is hit and miss if the two part canning lids will fit properly and may not seal properly.
- Nicks or hairline cracks in the jar are often hard to see, but it is worth it to inspect every jar carefully.
- Using a knife or other metal objects to release trapped air can cause scratches which become weak spots.
- Alternating using jars for canning and freezing which can make the glass more fragile. Ball and Kerr have produced jars that are suitable for both. Look for ‘Safe for Freezing’ on the box.
- It is estimated that the estimated life of a jar that is used every year is 10 years. (
- Over Tightening the Ring on the Lids. As a jar heats the contents expand, and the air in the ‘headspace’ is pushed out and that is what creates to vacuum that sucks the lid down and holds it in place when the jars cools. If the ring is too tight air can’t escape and pressure becomes excessive. Rings need to be just ‘finger tight’
- Failing to remove air bubbles
- Overfilling jars or packing tightly can create over-pressure

Conditions that can cause Thermal Shock to break jars includes:
- Putting jars directly on bottom of a canner without a rack. Metal racks are the best but it is possible to improvise one by tying some jar lids together.
- Putting hot food in cold jars
- Putting cold food in cold jars and then placing in a hot canner
- Placing hot jars on a cold surface that conducts heat away like a metal or marble counter. Always place hot jars on a towel, drying mat, rack, or wooden surface
- Leaving hot jars in a cold drafty area to cool
- Handling jars roughly, using ones that are old, have been dropped or handled roughly
- Using metal tools to remove air bubbles
- Putting jars directly on bottom of a canner without a rack, that gives them an opportunity to bounce around
- Leaving too much room around jars so they can bounce around. All canners have a suggested number of each size of jar. Fill excess space with jars of boiled water and can your own emergency water supply.
- The proper amount of water is not added or the seal isn’t working properly so there is steam loss and the canner runs dry.
- Pressure was reduced quickly after processing. Always let the pressure drop of its own accord.
- Air was exhausted at too high a temperature from the canner at the beginning of the process. Adjust heat so a steady flow of steam emerges from the canner.
- Pressure fluctuated during the processing period.
- University of Arizona Extension: Why jars break in a canner
- PickYourOwn.org: Why Do Canning Jars Break in My Canner?
- www.sbcanning.com
- Iowa State University Extension: Why did my canning jars break?
NOTES FROM HAL: Is There a Difference Between Broth, Stock, and Consomme'?

##
Posted on 6.6.20
NOTES FROM HAL: Fun Beverages Continued!


Whilst these infused water recipes use fresh fruit, you can make infused water with some frozen fruit too.
After you have drunk about half your infused water, simply top it up again with more water. You get a milder but still delightfully flavored water.
##
Posted on 5.31.20

- Watermelon, Basil and Strawberry Infused Water
- Strawberry, Lime and Mango Infused Water
- Lime, Ginger and Pomegranate Infused Water
- Blueberry, Apple and
- Mint, Lime and Cucumber Detox Water
- Grapefruit,
- Papaya, Passionfruit and Pineapple Flavored Water
- 4 cups drinking water
- 2 cups fresh fruit
- 1/4 cup sugar (or equivalent in another sweetener)
- 2 teaspoons fresh-squeezed lime juice
- lime wedges for garnish (optional)
- ice (optional)

Brits, Australians and Asians all have their own varieties drunk either chilled or warm.
##
Notes from HAL: on Soups and Stews

Let's being with a definition or two: that is the distinction between a soup and a stew? The following definition is similar to one we found at a number of sources.
The main difference between soup and stews is the amount of liquid they contain. While soups contain enough cooking liquid to fill a bowl and allow its ingredients to float, stews contain just a bit cooking liquid to simmer the other ingredients. (from tasteofhome.com)
I was examining a recipe from our Communications Manager's (Judy Cullen) grandmother, and contemplating what we might do with it in terms of presentation, re-thinking it for more contemporary ingredients.
Click to see that recipe: My Gramma's Vegetable Soup
While considering that I ran across this great article A No-Recipe Formula for Great Beef Stew.
Here is the summary statement from that article, which really caught my attention:
The Ideal Stew Ratio: Two Parts Meat, One Part Vegetable
- Two to three pounds of meat to serve a family.
- Beef is classic but lamb,venison, poultry are often used.
- Use beef top round, bottom round, or chucked cubed, trimmed of fat and connective tissue.
- Brown meat before stewing which gives it more flavor It creates a “fond." Fond [fond] n. Caramelized bits of meat sticking to the pan after browning.
- Heat a small amount of oil in a heavy pot like a Dutch Oven, brown the stew’s meat in batches in the warm oil before adding the stew’s liquid and vegetables.
- Onions, carrots, celery, potatoes are typical but mushrooms, turnips, parsnips, winter squash, chickpeas, kidney beans. Canned beans tend to work better than dry in these recipes, adding halfway through the cooking process.
- Aromatic vegetables like onions, celery, and carrots should be sauteed in a bit of oil before adding to the cooking liquid. These vegetables should be tender and fragrant before adding the meat and de-glazing liquid back to the pan.
Liquid
- 1 Cup all-purpose flour
- 2 Tablespoons onion powder
- 2 Tablespoons black pepper
- 2 Tablespoons paprika
- 1 Tablespoons celery seed
- 1 Tablespoons dried basil
- 1 Tablespoons salt
- 2 teaspoons dried oregano
- 1 teaspoon dried rosemary
- 1/2 teaspoon cayenne pepper
In a future post we'll cover preservation of Soups and Stews, which are made up of low acid ingredients. Meanwhile, Bon Appetite!
Posted on 4.12.20
NOTES from Hal:
 A Study in Substitutions - Curry Butternut Squash Soup with Corn
ORIGINAL |

##
Posted on 4.9.20
 NOTES from Hal:
 On Slow-Cooker Ketchup
One of my favorite condiments has gotten a bad rap because of all the extra salt and/or sugar and corn syrup it includes. This recipe is simple, allows you to control the amount of salt and sweetener and is flexible in the form the main ingredients start from.
- Tomatoes- can use fresh or home frozen tomatoes
- Onions - fresh or reconstituted dehydrated
- Apple Cider Vinegar - for safety be sure the vinegar is a 5% acidity. I prefer to use real cider vinegar rather than the distilled white vinegar that is colored.
- Sweetener - can substitute other sweeteners besides brown sugar
- Sea Salt- you can play with the proportion or even used a flavored salt like Curry or Smoked Paprika Salt
- Herbs and Spices- as long as they are all dried feel free to play with proportions. Using fresh herbs alters the acidity ratios and a specific tested recipe is needed
No comments:
Post a Comment